Appendix: Example of Identity Provider Configuration
This appendix includes an example of how to configure an Okta OIDC identity provider for OneStream IdentityServer (OIS). Depending on the identity provider and version, the steps you need to complete might be different.
To manage identity providers, you must:
-
Work with the Cloud Operations team to configure users and environments for OneStream IdentityServer. See Onboarding Process and Considerations and Best Practices.
-
Have group-based access to the system security role to manage identity providers. See Required System Security Role.
By default, the system configuration is enabled for the feature to manage identity providers. If you need support with the system configuration, submit a Support ticket.
Okta OIDC Identity Provider
The following sections show how to create an Okta application and copy the redirect URI from the OneStream Identity & Access Management Portal and paste it in the Okta application.
Create an Okta Application
As you complete the steps in this section, you will copy the following information and paste it in the Identity & Access Management Portal:
-
Okta server URL
-
App integration name
-
Client ID
-
Client secret
See Add an OIDC Identity Provider.
-
Copy the Okta server URL (for example: https://companyname.okta.com). Paste this URL in the Identity & Access Management Portal in the Issuer URL field.
-
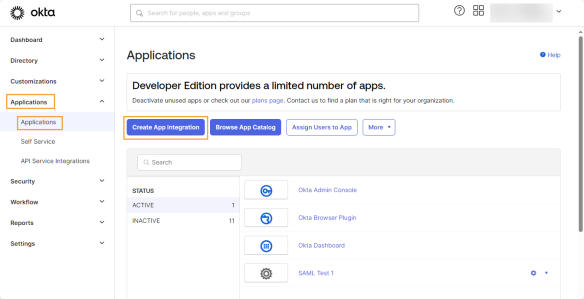
Sign in to Okta and go to Applications > Applications.
-
Click the Create App Integration button.
-
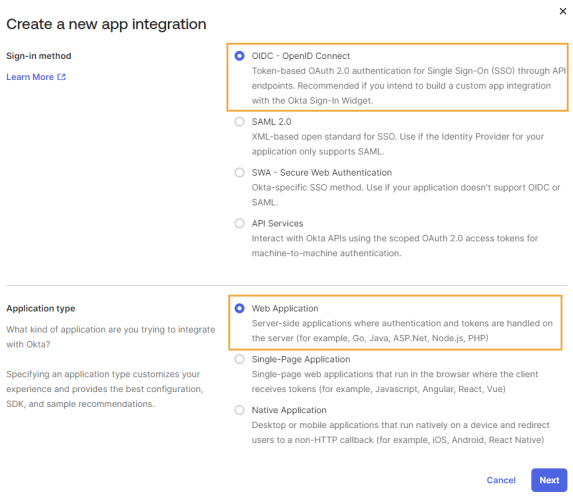
A Create a new app integration dialog box displays.
-
For Sign-in method, select OIDC - OpenID Connect.
-
For Application type, select Web Application.
-
-
Click the Next button.
-
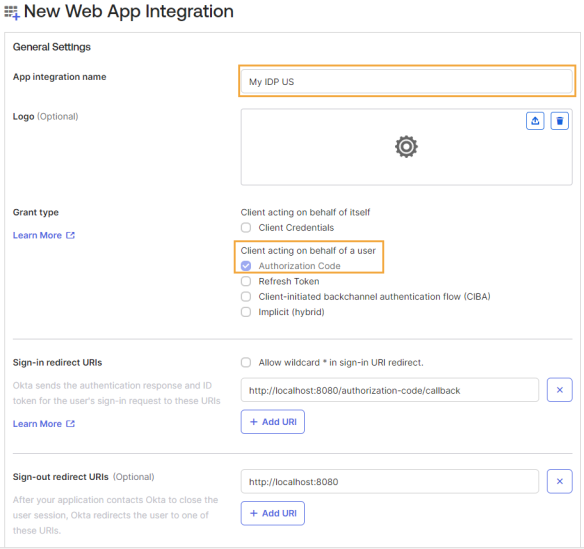
The New Web App Integration page displays.
-
Enter an App integration name in the field. Copy and paste this name in the Identity & Access Management Portal in the Name field.
-
For Grant type > Client acting on behalf of a user, verify that Authorization Code is selected.
-
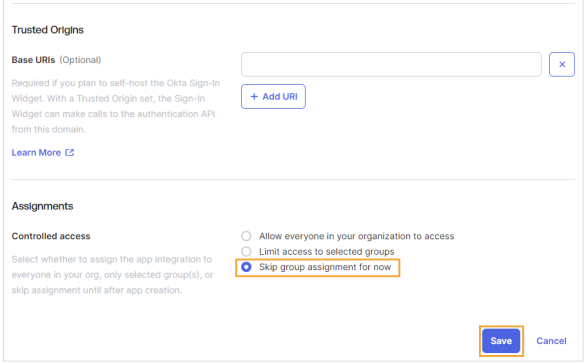
For Assignments, select Skip group assignment for now.
-
Click the Save button.
-
-
The application opens on a new page.
-
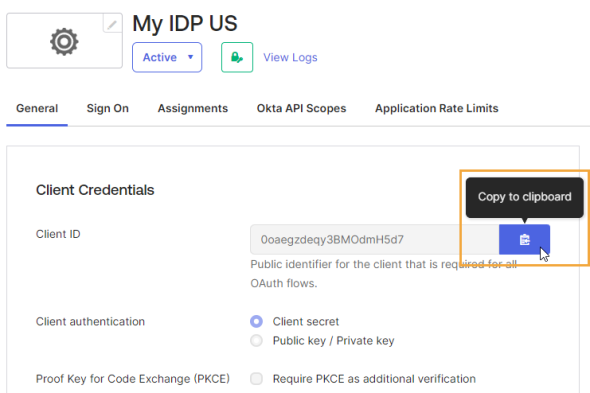
For Client Credentials > Client ID, click the Copy to clipboard icon. Paste it in the Identity & Access Management Portal in the Client ID field.
-
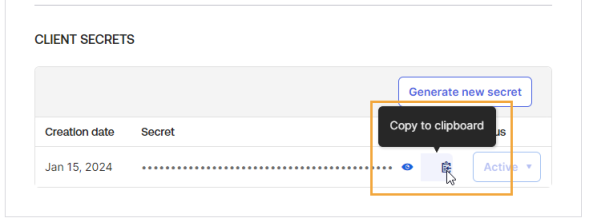
For CLIENT SECRETS, click the Copy to clipboard icon. Paste it in the Identity & Access Management Portal in the Client Secret field.
-
-
Select the Assignments tab and assign the application to any users who will use OneStream.
After you create the Okta application, go to the OneStream Identity & Access Management Portal and add the identity provider. See Add an OIDC Identity Provider.
Paste the Redirect URI in the Okta Application
After you add the identity provider in the Identity & Access Management Portal, you must copy the redirect URI from OneStream and paste it in the Okta application.
-
Copy the redirect URI from the Identity & Access Management Portal in OneStream. See Add an OIDC Identity Provider.
-
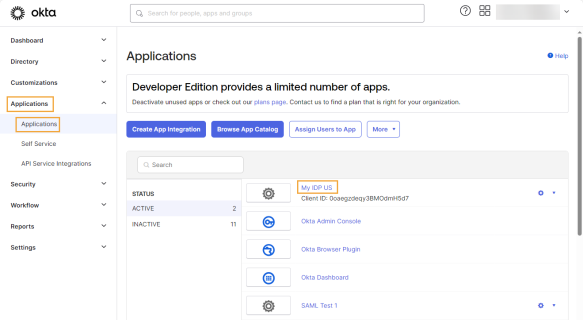
Sign in to Okta and go to Applications > Applications and select your identity provider.
-
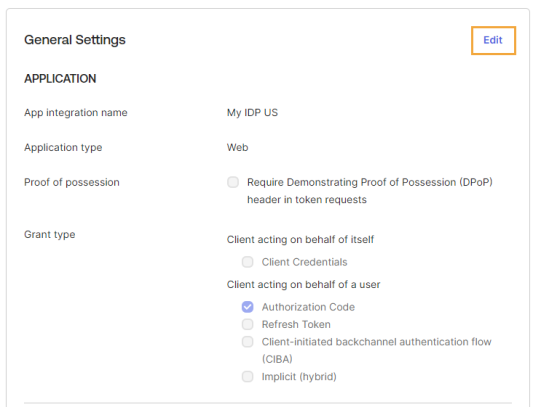
Go to General Settings and click Edit.
-
Go to LOGIN > Sign-in redirect URIs and paste the redirect URI in the field.
-
Click the Save button.
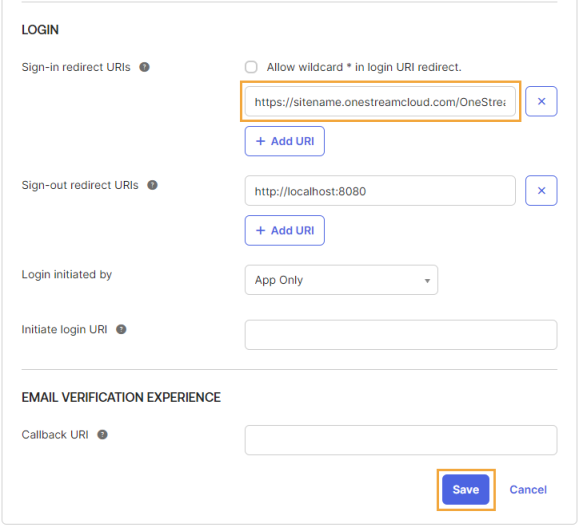
After you paste the redirect URI in the Okta application, go to the OneStream Identity & Access Management Portal and test the identity provider. See Test an OIDC Identity Provider.
Then, configure users for authentication in OneStream. See How Users are Configured for Authentication.